Frequently Asked Questions

What is ARway App?

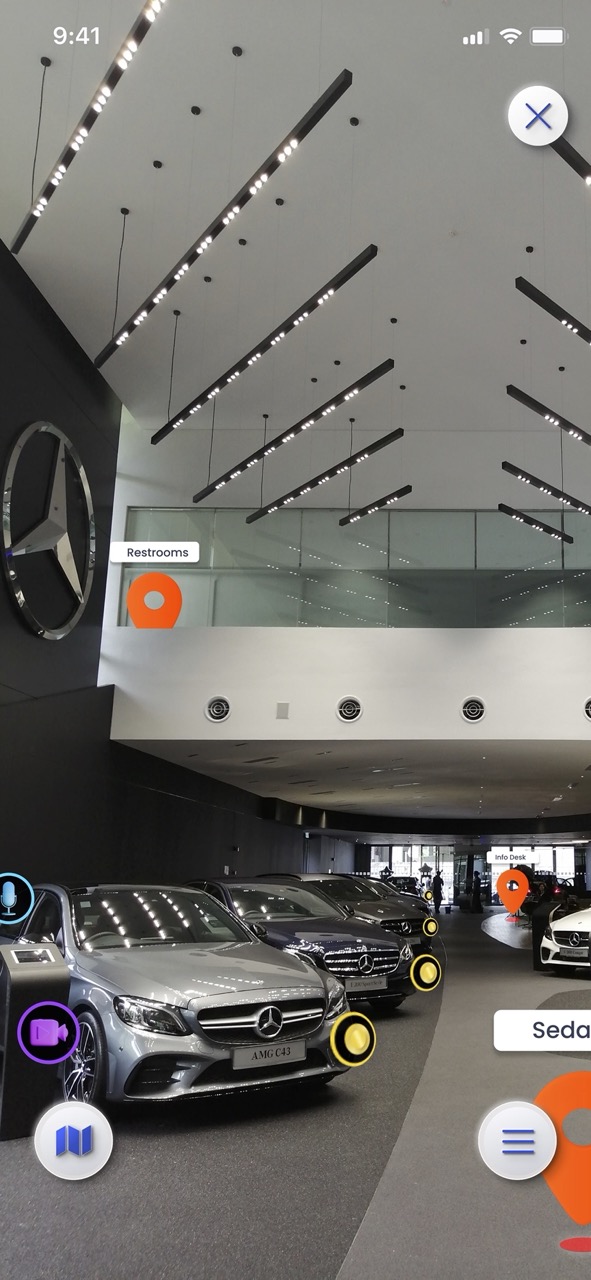
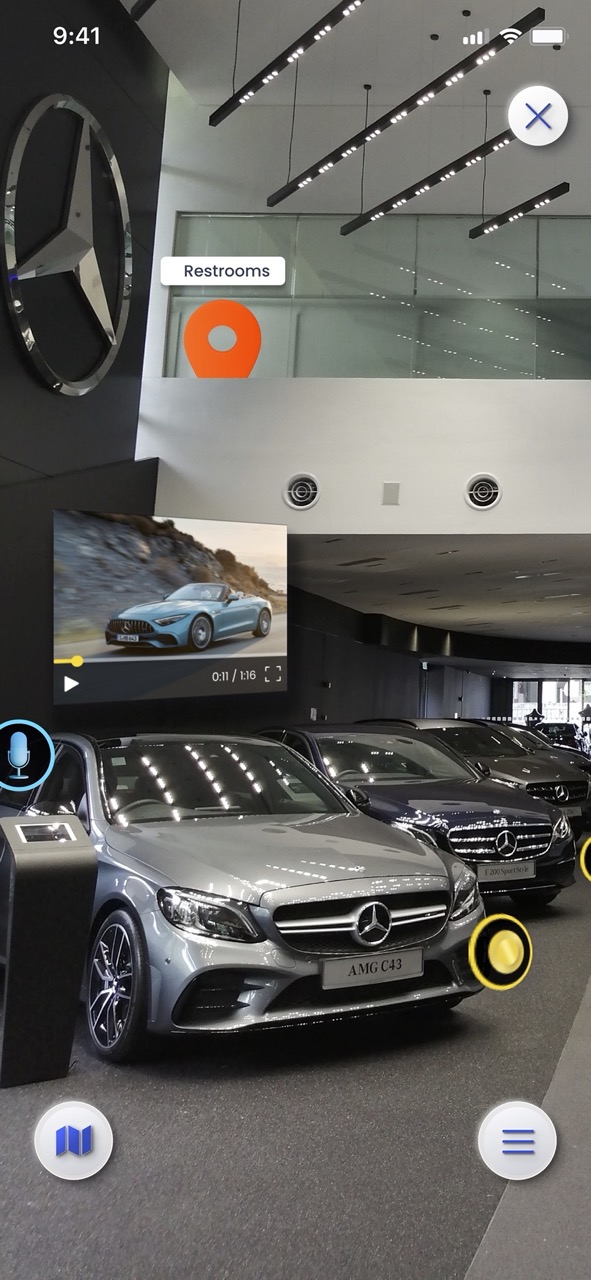
ARway App is a smartphone application available on iOS and android for authoring, creating 3D Digital Twins, sharing, and viewing location-persistent AR experiences and AR Navigation. It is a self-serve solution, and all is done on a smartphone device in a matter of minutes.

How does ARway App work?
ARway App builds upon AI-enabled computer vision for smartphone camera devices to recognize their surroundings and display hyper-accurate location-anchored AR content. No additional hardware or markers are needed.
Is it available for both iOS and Android?
Yes, ARway App is available on ARCore or ARKit supported Android or iOS devices.
What is ARway App Mapping?

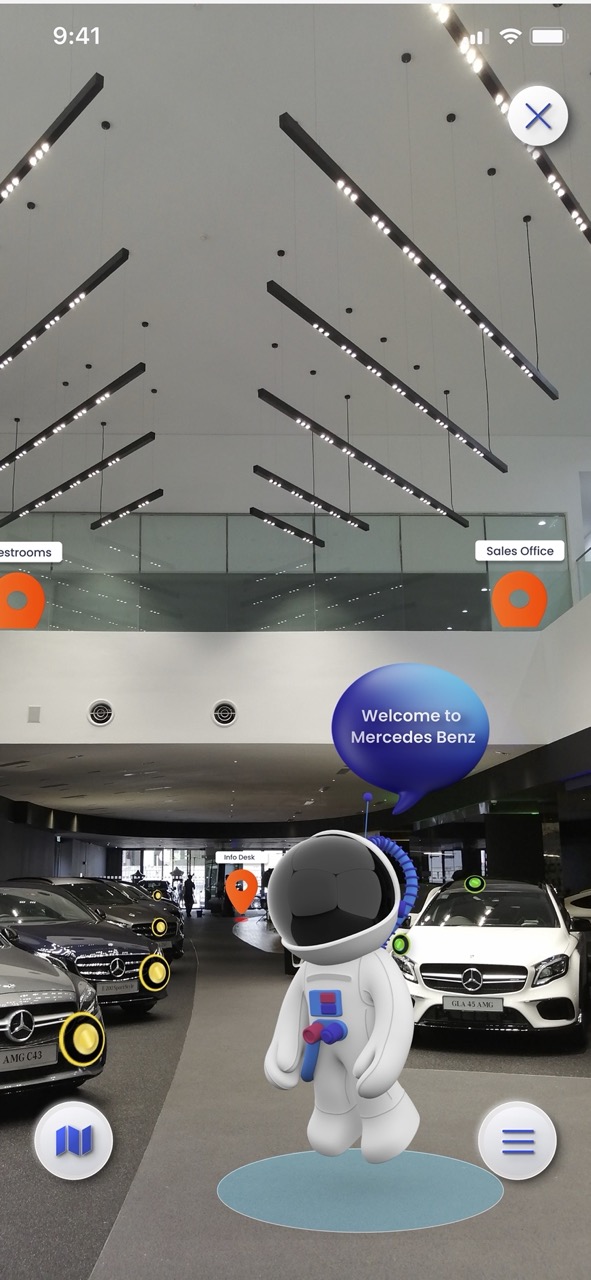
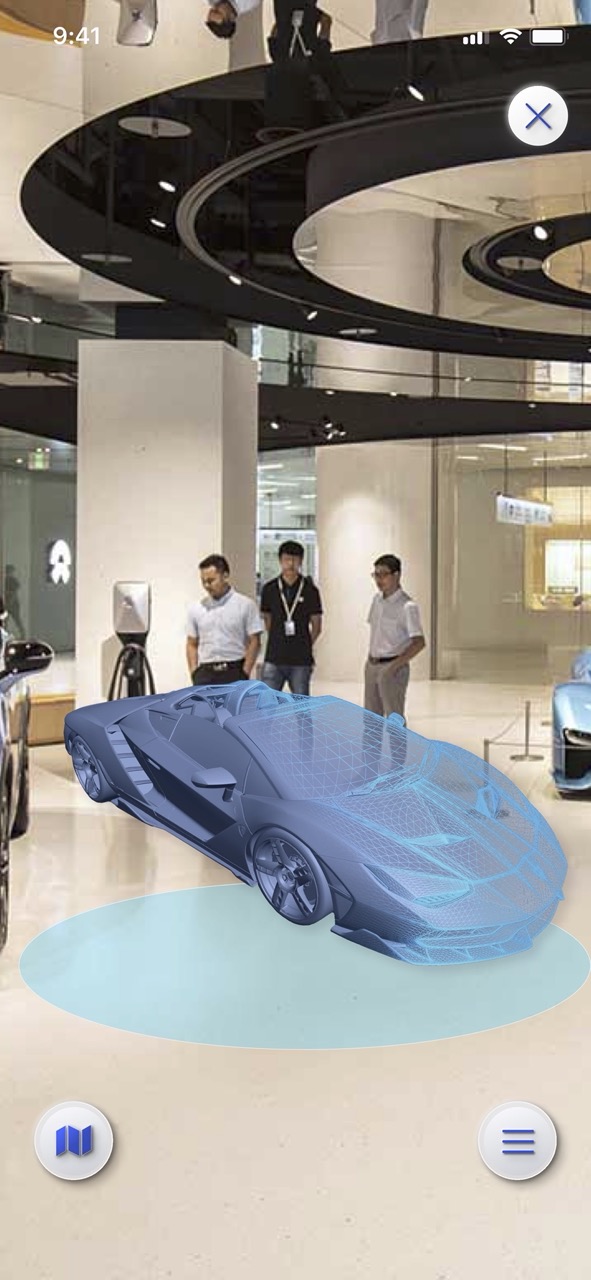
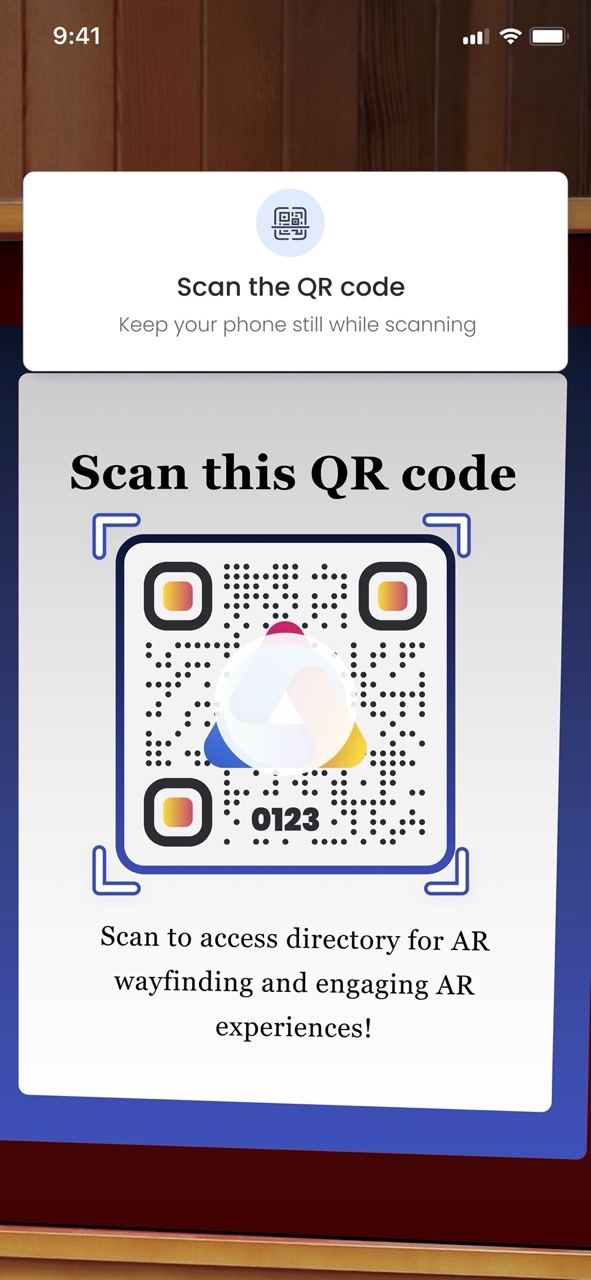
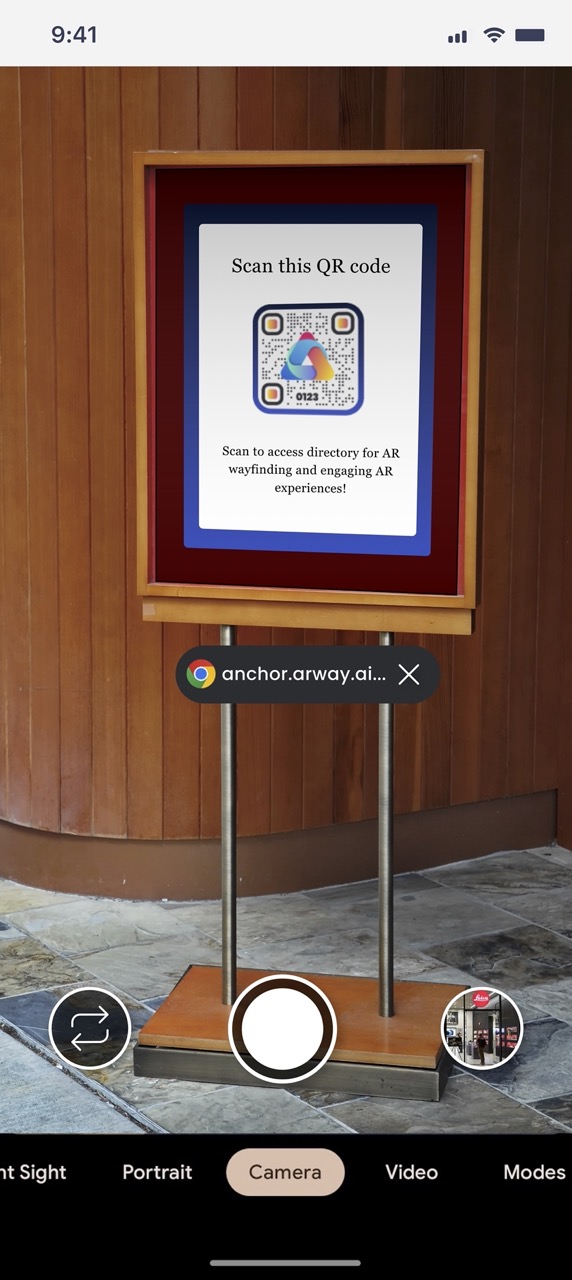
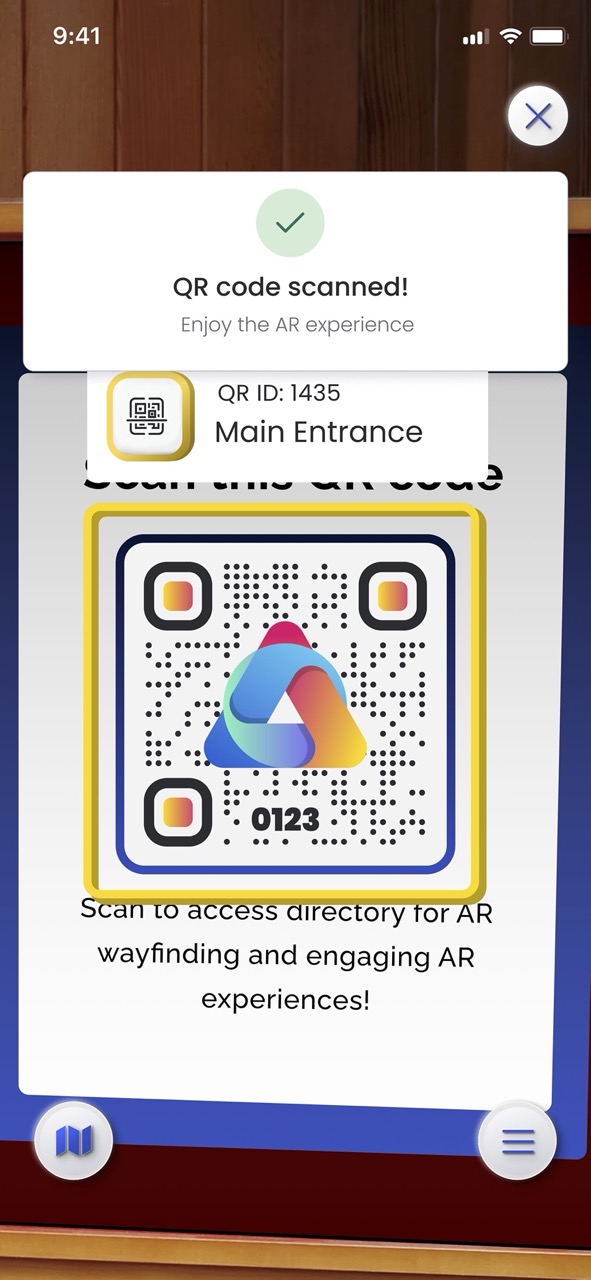
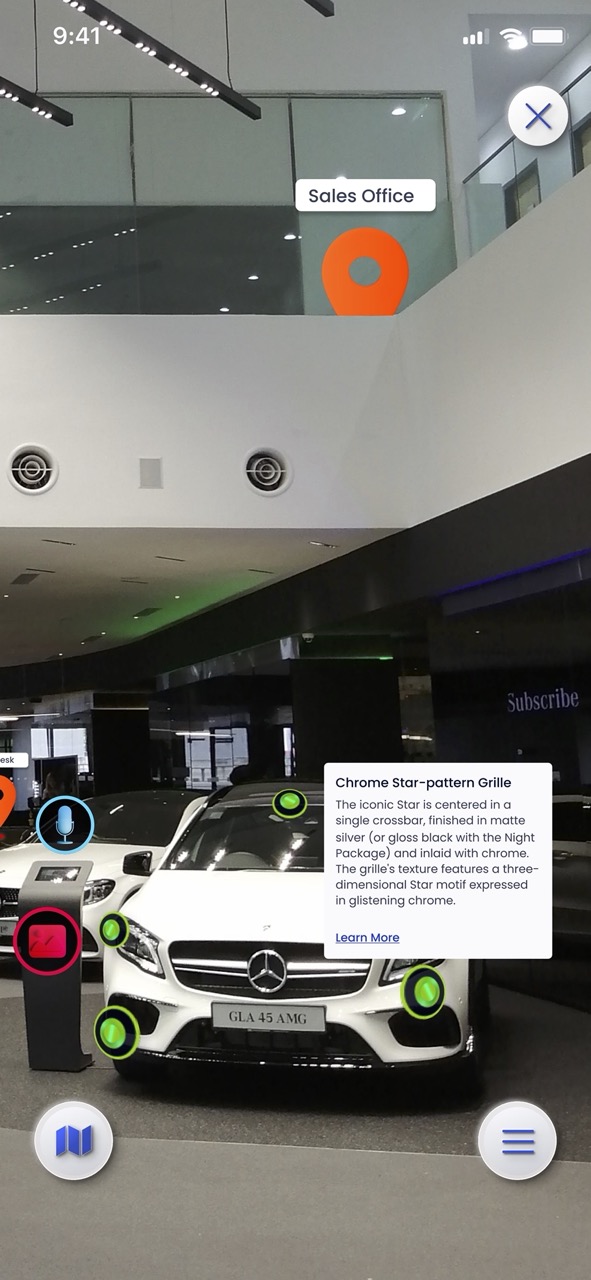
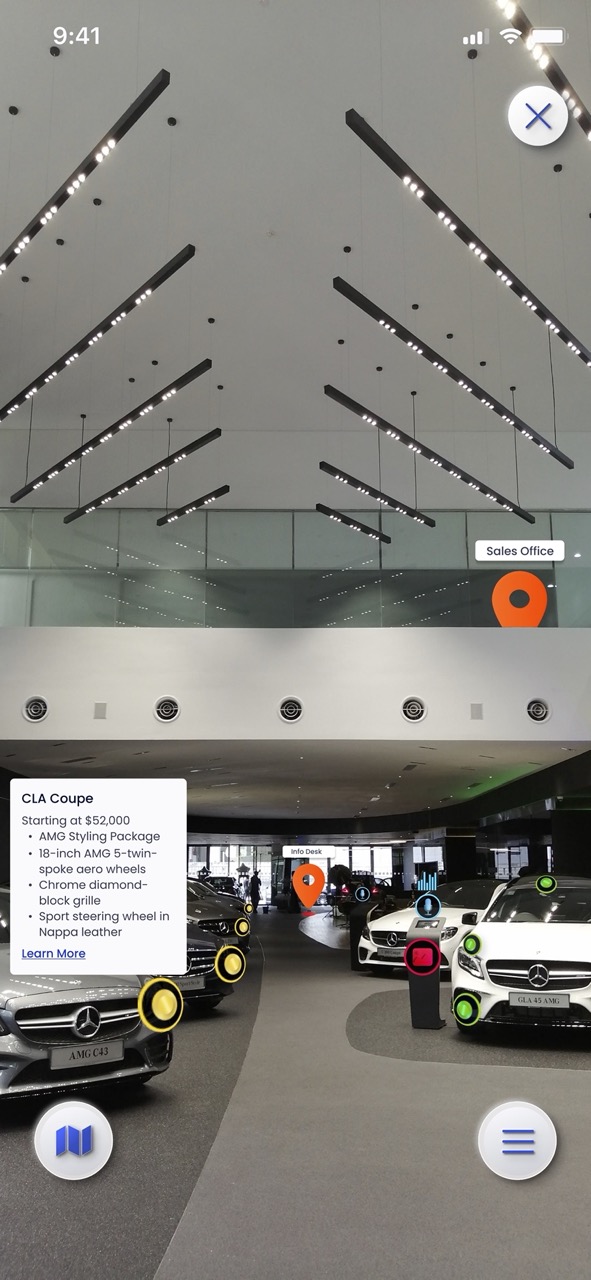
Use the ARway app to generate a unique QR code and place it within your location. Scan the QR code to anchor it to that location and drop location pins around the venue. Save the map and reopen it in the Creator Portal. Once opened in the Creator Portal web Studio, upload a floorplan that corresponds to that location and populate it with AR content like navigation paths, guided tours, 3D models, images, videos, text, audio and more. Once done populating it with your desired content, publish the map to allow your visitors to navigate your venue with it while interacting with the content.

Activating your ARway Map

What are the best practices for mapping?
Are there any limitations when creating AR maps?
There are no limitations to the size of the map.
How can I share my AR map?

The best way to share maps is through QR codes placed in the location – upon scanning, users will be deeplinked to the map of the facility. AR maps can be shared by sending the link to the map via messenger, email, or social media platforms, which will redirect the recipient to the corresponding application and map. Alternatively, a map can also be shared by sending the map code, which map visitors can type into the search bar in the ARway app or respective white label app.

How do I access a map?
First, make sure you are in the location associated with the AR map. Once in the right location, scan the map QR code with your smartphone camera, which will redirect you to the ARway app – if you don’t have it downloaded, it will prompt you to do so. Then you will rescan the QR code to activate the AR map. Once activated, feel free to search for the location you want to be navigated to in the location directory, while viewing and interacting with AR content in your surroundings.
Do I need to create an account for using ARway App?
As a guest user, you can view AR Maps that were shared with you. To create AR Maps, you will need to create an account within the app.
Can I use the app indoors or outdoors?
You can use the app both indoors and outdoors in optimal lighting conditions.
What are the best practices for Image Access Points?
Users’ mobile network bandwidth can be limited, and having multiple pieces of content in one area may cause slow loading times for some objects. To prevent this, it is recommended to have a maximum of 5 pieces of content in a 25 meters squared area.
Is occlusion supported in the app?
Yes, occlusion is supported in both Android and iOS versions of the app. Real-time occlusion in iOS allows virtual objects to be blocked by real-world objects, while app clipping is used in Android to hide virtual objects behind physical objects in the real world.
What are the best practices for the Occlusion feature of the ARway app?
What types of AR content work with occlusion?
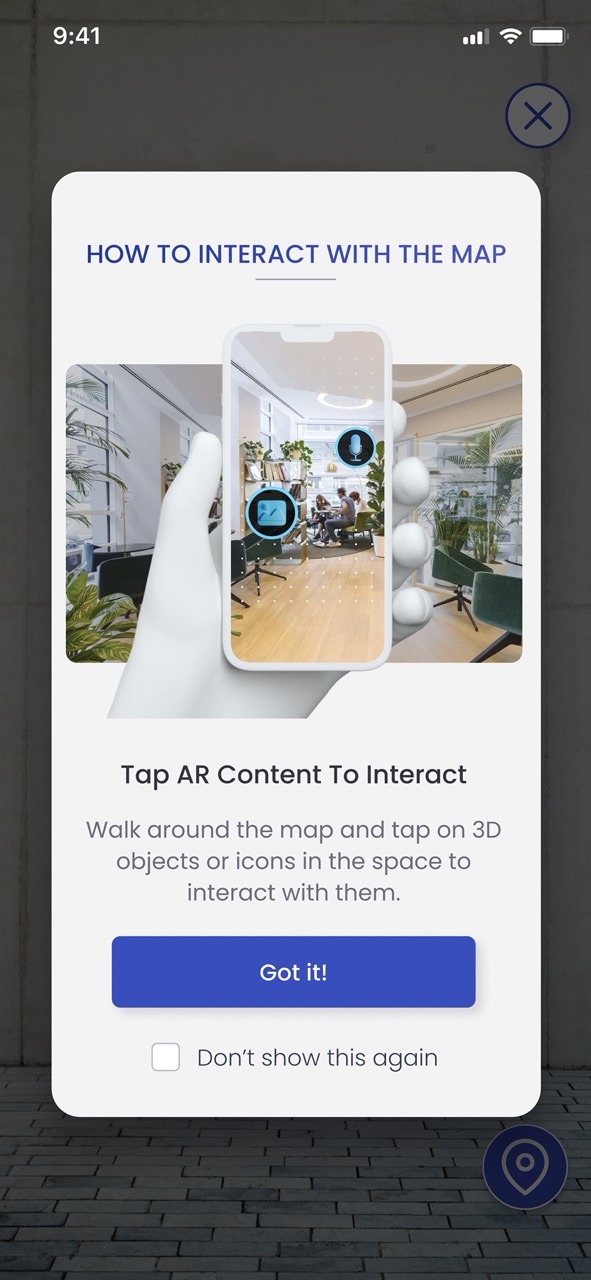
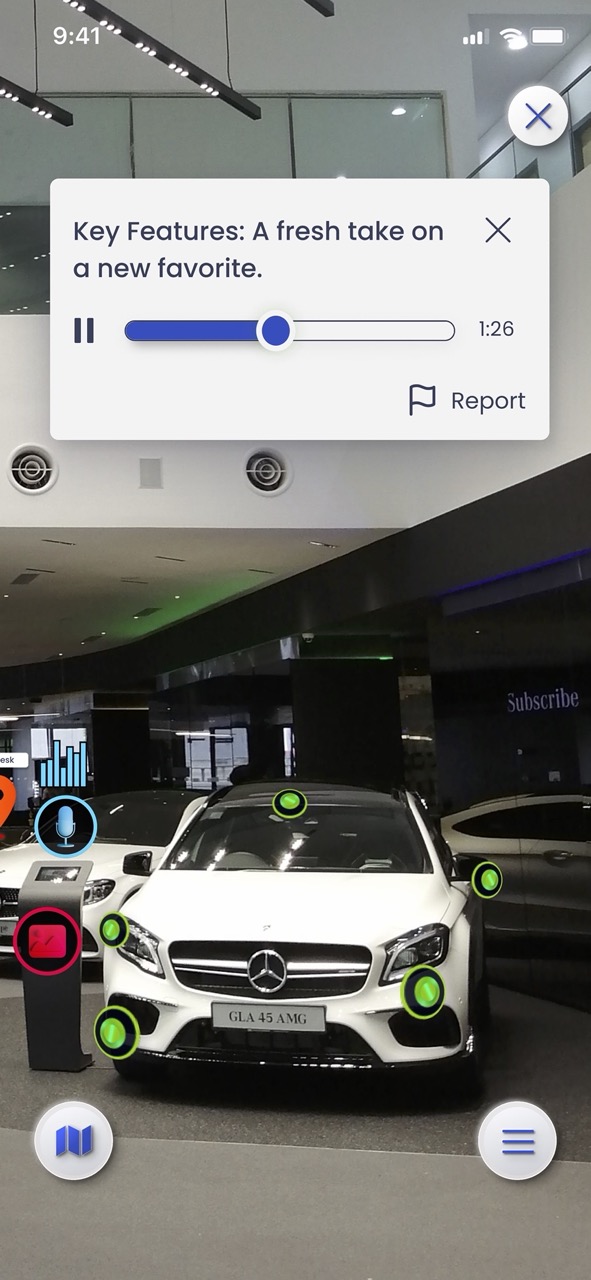
All types of AR content can be occluded, including 3D models, videos, location pins, guided tours, hotspots, audio indicators, and text.
What is the Floor Plan Auto-Alignment feature?
ARway’s Floor Plan auto-alignment feature allows users to easily align their digital content to the physical space using a 2D floor plan image. The feature scales and rotates the floor plan to ensure quick and accurate alignment. To align their floorplan using the ARway app, users are required to place six pegs in their space in AR.
How do I align my floor plan?

Client can utilize the floor plan alignment tool to align their selected floor plan with the AR content. The steps for alignment are as follows:

  • User uploads a floor plan during map creation in the creator portal.
  • In the app they will be prompted to align the floor plan.
  • User will place the pegs in their space and match the positioning on a 2D floor plan.
Where should I place the pegs?
Make sure that the pegs are aligned correctly with your floorplan, if one peg is in the wrong spot it will cause issues with alignment. Place the pegs with the bottom of the tip being where it should be.
What are the best practices for floor plan alignment?
  • Use a JPG or PNG file for the floor plan image.
  • For the scale of the image, we recommend between 50-100 pixels per meter (16-31 pixels per foot) in the real world.
  • Place the 6 pegs in easily identifiable areas on the floor plan, within a 10-meter radius of the initial access point to minimize drift.
  • Use the latest iPhone Pro model for map setup.
  • Measure the QR code size before activating the map; the size refers to the length and width of only the black portion of the QR code, not including the blue and white border.
  • Stay within 10 meters of the primary QR code when placing the floor plan pegs.
  • Place floor plan pegs on corners of the wall or spots that are easily distinguishable on the 2D image.
  • Place the floor plan pegs in a ‘box’ formation and not in a straight line.
  • Ensure that the device remains steady during setup.
  • Do not ‘background’ the ARway app when in the ‘Edit Content’ mode.


What is the Accuracy Meter?

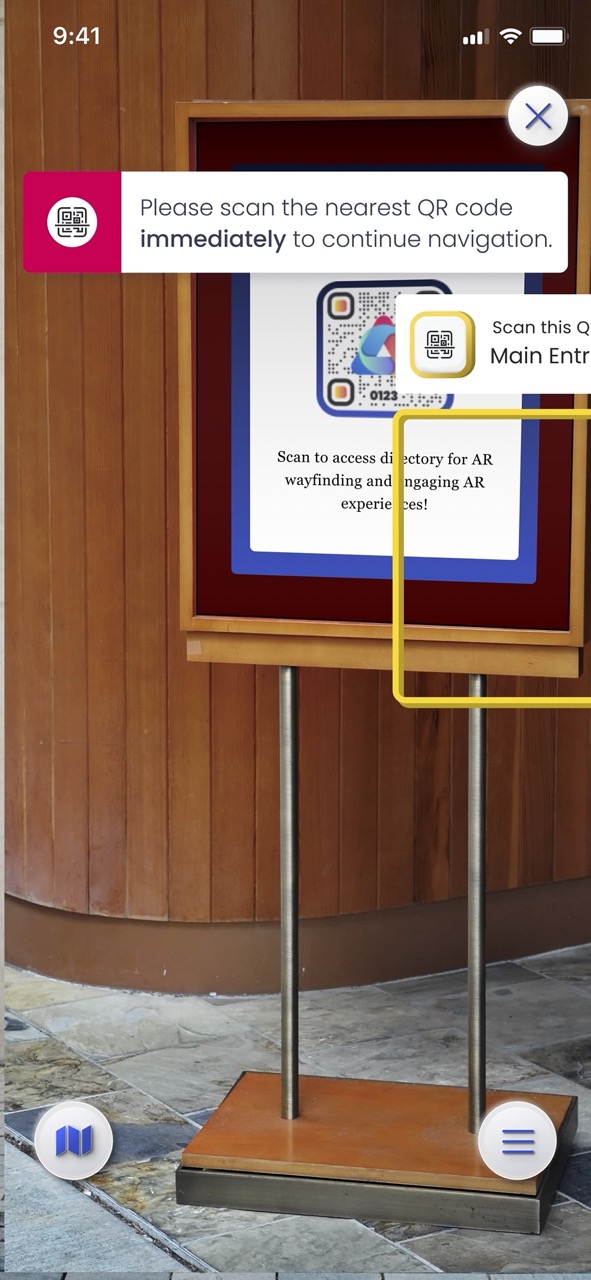
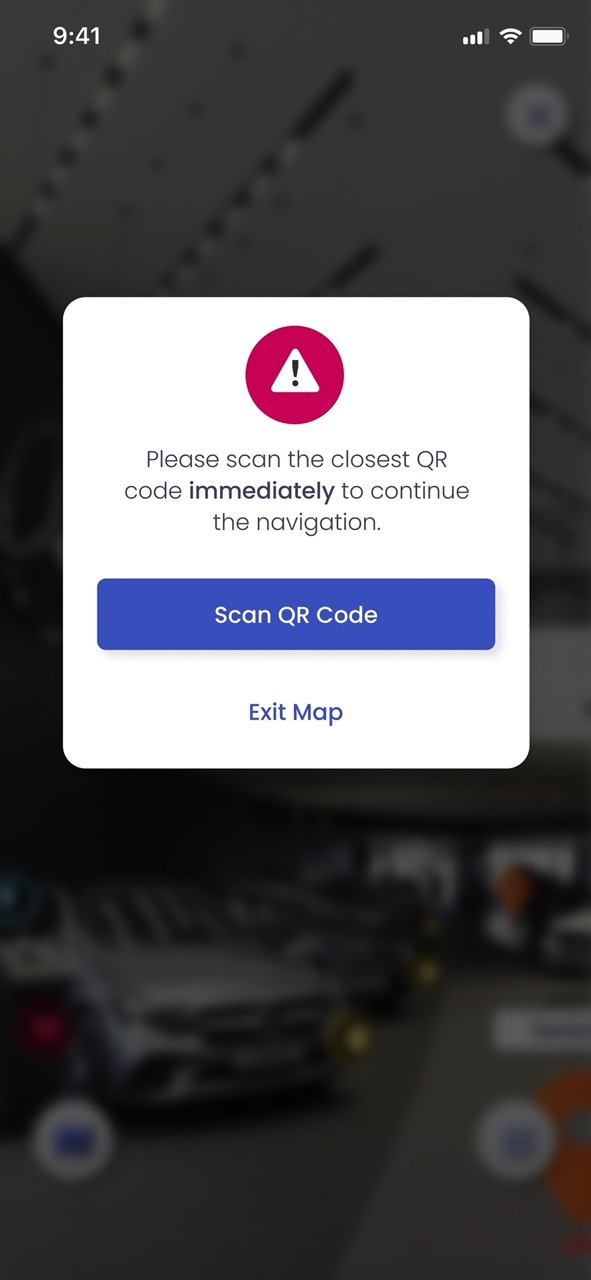
ARway’s accuracy meter is a real-time location accuracy indicator displayed during a map experience. It uses custom algorithms to determine drift and displays a dial from 10 to 1. The dial will show a perfect score of 10, a declining accuracy score of 5, a recommendation to rescan at a score of 3, and a requirement to rescan at a score of 1. The accuracy meter also provides additional details and directs users to the nearest access point if they need to rescan.

How are users able to view turn-by-turn navigation wayfinding to a destination?

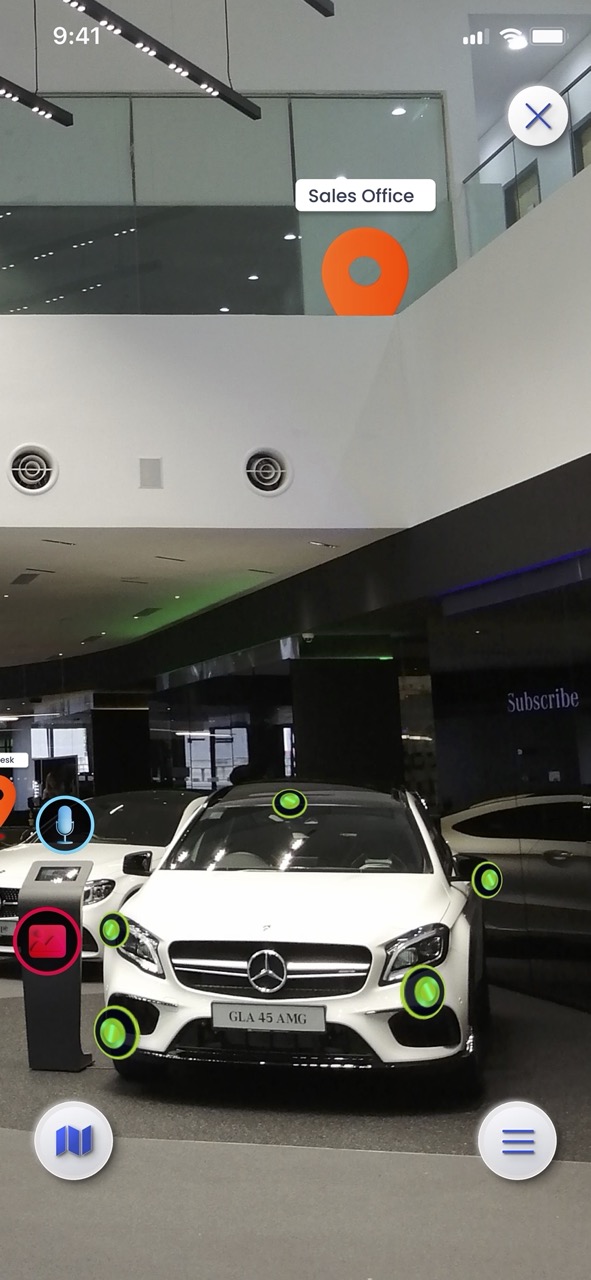
To enable turn-by-turn navigation, paths must be created in the Creator Portal. The user can access turn-by-turn navigation instructions in the bottom tab of the location directory. By scrolling up from the bottom of the screen, visitors can view the steps. Moreover, navigation is displayed with a direction arrow or the selected navigation style.

Is there a way for users to see if the path is wheelchair accessible?
Yes, a wheelchair accessible logo is displayed to indicate if the path is “All Access”.
How does ARway decide which path to take visitors through when there are both “All Access” and “Walkable Only” paths?
By default, it will bring users to the “All Access” paths. However, if there are different paths for walkable and all access, different path options are shown at the start screen for the user’s selection.
Are brand assets displayed with location pins, and can brand assets be uploaded when defining location pins?

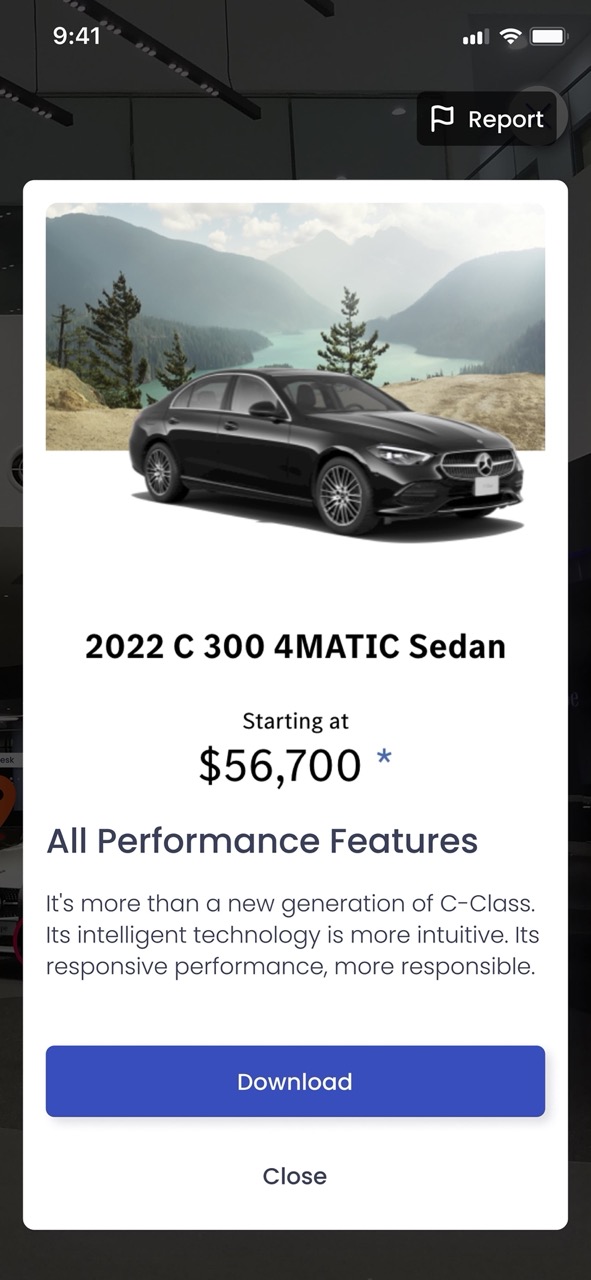
Yes, brand assets and information can be added during pin creation or added later. This information is available to the visitor from the directory search. Up to 6 images, name, description, pin and path colors, navigation style, categories, logo, attached file, phone number, and website URL can be included.

Is it possible to show thumbnail images as part of the location description, and can thumbnail or images be uploaded when defining location pins?
Yes, location pin thumbnails/logos are shown in the Directory list and in the location pin details page. They can be uploaded in the Creator Portal editor.
Can the user relocalize during pathfinding?
Yes, during pathfinding, users can relocalize by holding up their phone to scan QR codes and images access points.
How do I re-align a floor plan?


  1. Open the ARway app and login to your account.

  2. Select the map you wish to realign from the dashboard or the ‘My Maps’ tab.

  3. Click the ‘Edit Map’ button.

  4. After the AR view opens, scan the QR code for your map to enter the ‘Edit Content’ mode.

  5. Tap and hold the floor plan pegs to reposition them in the AR space.

What are Recharge Stations?
Recharge stations are visual markers – QR codes or Image Access Points placed in the map or location. Visitors can enter AR experiences and boost the accuracy of their experiences at recharge stations / access points.
What is the Creator Portal?
The ARWay Creator Portal is an online web platform and editor that can be used to create and manage AR maps associated with different geographic locations, which can then be viewed through the app built with our SDK (ARwayKit).
How does the Creator Portal work with the ARwayKit SDK?
The Creator Portal helps you in managing large-scale environments like shopping malls, airports, etc. You have access to all your maps, which you can enhance by uploading corresponding floorplans, placing AR content, creating guided tours, and viewing analytics. Manage your accounts and generate API keys to build your AR wayfinding apps through the Creator Portal.
How does the Creator Portal work?
The ARway Creator Portal is your all-in-one place to manage, edit and track the performance of your maps. It gives you the ability to place content such as 3D models, images, videos, text, navigation paths, guided tours and more remotely through the Studio and be experienced in real life in real time. The data from the creator portal can be accessed through REST API’s in simple JSON format.
What are location pins?
In ARway, location pins are markers in augmented reality that show you where to go in the real world. Location pins can have customized branding attached to them with images, downloadable content, and logos.
What are amenity pins?
Amenity pins in ARway are like location pins, but they come with icons representing specific amenities such as elevators, reception areas, restrooms, escalators, stairs, cafes, exits, lost and found, and security. They enhance user navigation and wayfinding by clearly indicating the locations of essential amenities within your map.
What are paths in the Creator Portal?

Paths are created as lines to offer optimized and interactive directions for a seamless visitor experience. When users search for location pins in the app, our algorithm will lead them along these designated paths to their desired destination. This ensures a smooth and engaging journey for users as they navigate through the AR environment.

Is it possible to edit an existing floor plan to define "All Access" and/or "Walkable Only" paths within the map?
Yes, “All Access” and “Walkable Only” paths can be created and added to existing floor plans. This allows mobility group specific paths for visitors.
Can location pins be organized into groups for easier sorting?
Yes, location pins can be grouped into categories and subcategories. Each location pin can be assigned multiple categories or subcategories.
How many levels of categories can be created for location pins?
Two levels can be created: categories and subcategories.
What happens when the user is navigating towards a location pin but not near a path?
Navigation reverts to a compass-style default navigation arrow experience towards the intended destination without turn-by-turn capabilities.
What are some best practices for path creation for intuitive wayfinding experiences?
  • For path navigation, a pin should be placed on paths or within a maximum distance of approximately 3 meters (or 9.8 ft) from the path
  • QR codes or Image Access Points should also be placed on the path or within a maximum distance of approximately 3 meters (or 9.8 ft) from the path.

What types of content can be added to the Creator Portal Editor?
  • 3D models (.glb) with a file size limit of 10MB
  • Images (.png, .jpg, .jpeg) with a file size limit of 3MB

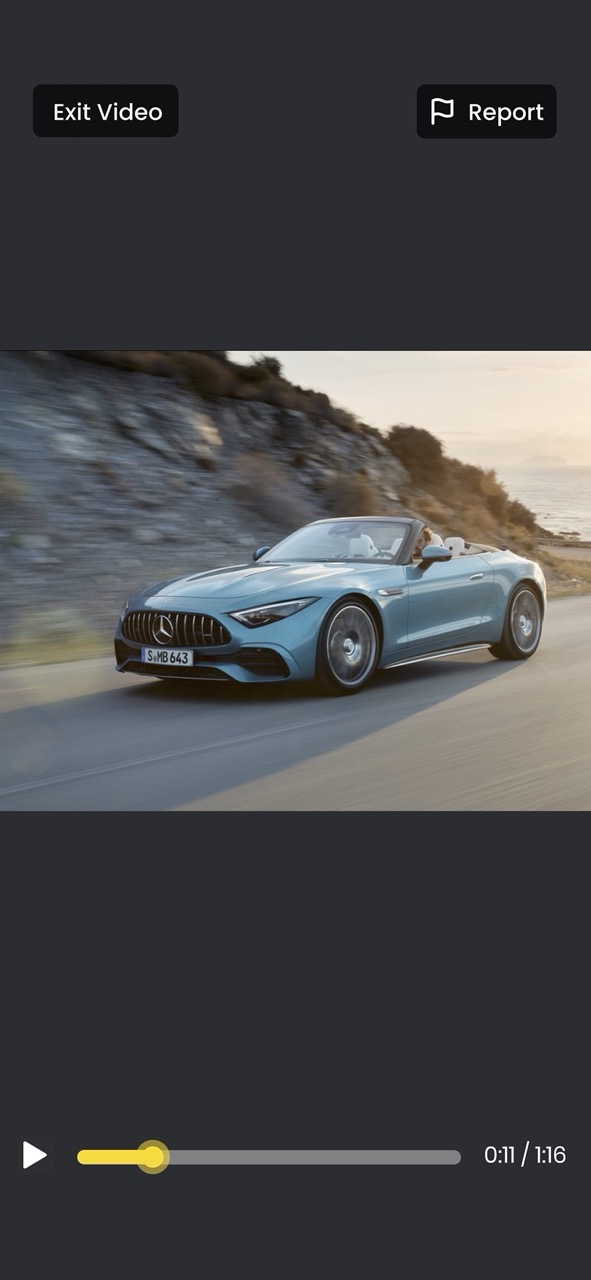
  • Videos (.mp4) with a file size limit of 12MB

  • Audio files (.mp3, .wav, .m4a, .ogg) with a file size limit of 3MB

  • Floorplans (.png, .jpg, .jpeg) with a file size limit of 10MB

What types of content can be added to the Location Pins?
  • up to 6 images (.png, .jpg, .jpeg) with a file size limit of 3MB
  • logo (.png, .jpg, .jpeg) with a max resolution of 512x512px

  • downloadable file (.png, .jpg, .jpeg) with a file size limit of 3MB

  • name

  • description

  • category name

How can I manually align a floor plan?

To manually align the floor plan, you will need to first complete the map activation and floor plan alignment in the ARway app.

1. Login to the Creator Portal.

2. Go to the “My Maps” page.

3. Click the map you want to edit from the list.

4. Click the “Open in Studio” button on the top right.

5. Click the floor plan image while in the Studio editor.

6. Click the “Adjust Floor plan” button on the left.

7. Modify the position, rotation, and scale transformations for the floor plan using the panel on the left. Or modify the transformation using the gizmo for position, rotation, and scale that can be selected on the top right.

8. Click the “Save” button on the bottom left when finished.

Keep in mind that when manually aligning the floor plan, the location pins and paths will move along with it, as their placement is based on the floor plan image.

 
What are Template Floor Plans?

Template floor plans are pre-designed layouts that allow creators on the ARway platform to begin crafting AR experiences without a detailed floor plan, offering a convenient way to explore the Creator experience flow in a space.

Using Template Floor Plans

  1. Begin creating AR experiences with new Template Floor Plans.

  2. Click “Set up Map” to start the process.

  3. Enter the name and description of your new map and add a thumbnail.

  4. If you don’t have an accurate floor plan or want to create a demo map, choose the floor plan template that best reflects the shape of the office or room.

  5. Click “Select a Sample Floor Plan” and choose the template for your space.

  6. Browse the options and select the template.

  7. Click “Upload” and name the floor plan.

  8. Click “Next” to download the QR code and activate your map.

 
How do I create a Venue Map?
Venue Maps are created from multiple connected maps to allow for navigation between multiple floors, areas, zones, or sections.
 

Connect Maps

  1. Go to the My Maps tab and select a map.

  2. Click Open in Studio.

  3. In the scene Contents menu on the left, click Import Maps.

  4. Select or search for the maps you want to connect and click Next.

Create a Venue

  1. After connecting two or more maps, create your venue.

  2. Select a Venue Thumbnail and enter a venue name and description.

  3. Choose the naming convention for different levels or areas.

  4. Re-order maps by dragging them from the left-hand side.

  5. Assign level types individually per map and edit map names and identifiers.

  6. Click Save & Continue when finished creating the venue.

Add Connector Pins

  1. Now that you have a venue, add connector pins to the maps.

  2. Select your venue map and click Open Studio.

  3. Click the Location pin icon and choose Connector Pin.

  4. Follow on-screen instructions for details.

  5. Place the connector pin in the correct location.

  6. Add an image, name, and description.

  7. Select pin color and path style.

  8. Click Create a Connector Group and name the group.

  9. Choose the QR code closest to the connector pin and Save.

  10. Repeat the process for additional connector pins on different levels.

  11. When finished, click Done and then Save & Exit.

     
What is the ARwayKit SDK?
ARway Software Development Kit (ARwayKit SDK) is an all-in-one set of cross-platform software tools and programs built on Unity that allows developers to leverage ARway’s Visual Positioning System (VPS) capabilities to build AR applications for localization and navigation.ARwayKit comes with many sample codes to get you started for use cases such as Localization, Navigation, AR Games, Multiplayer and Multi-Maps (for large scale AR experiences), as well as other guiding documentation that developers can use and integrate into their apps. Developers can use ARwayKit to build and maintain maps with AR experiences without having to write everything from scratch.
What is the ARwayKit SDK size?
For Android builds, the ARwayKit dll which contains the library of the ARwayKit functions is < 1MB. On iOS builds, the ARwayKitSDK adds < 200MB. The sample apps for Android and iOS build to about 50MB and 100MB respectively.
Do I need to create an account for using ARwayKit?
Yes, you will need to create an account and generate your access token on our Creator Portal in order to develop apps using ARwayKit.
Do I need to create any separate 3rd party accounts?
No 3rd party account is needed. The only account needed is an account in the ARway portal to generate an API Secret Key for your app.
Which version of Unity do I need to use the ARwayKit SDK?Which version of Unity do I need to use the ARwayKit SDK?
Our Unity SDK is tested with Unity Version 2021.3.1f1 or Above (LTS).
Do I need any specific device to develop apps with ARwayKit?
Yes, you need to have an ARCore or ARKit supported Android or iOS device.
Does the SDK make any API calls (use the Internet)?
Yes. The SDK makes calls to the ARway service to fetch information about the maps and download any assets needed to render the AR experience.
Does the SDK download any external data at runtime?
Like the ARway app, the SDK accesses data from the ARway API service during runtime. While the end user is experiencing a map, the SDK also downloads assets, such as images, audio clips and 3D models as the user encounters them in the map.
What permissions are required by the SDK?
The ARway SDK requires permissions to use the camera and location services on your device. The SDK also requires access to the photo gallery if the user chooses to record video or snapshots of their experience.
What is the minimum version of the OS (iOS and Android) supported by the SDK?

Please refer to Product Spec Sheet below.

Product Specifications

What do I need to prepare to brand the SDK Sample app?
  • For path navigation, a pin should be placed on paths or within a maximum distance of approximately 3 meters (or 9.8 ft) from the path
  • QR codes or Image Access Points should also be placed on the path or within a maximum distance of approximately 3 meters (or 9.8 ft) from the path.

What is a 'View'?
A view is an instance in which an AR map is opened with the ARway app or SDK app for the purposes of editing or viewing the experience. It is device agnostic and aggregated for the account.
How does Localization work?
During Localization, the user sends the camera image(s) to the ARway cloud service and queries for the user’s current Pose (position and rotation) in the previously mapped area, if the process is successful, then in response you get the correct local Pose.It’s important to note that the Pose is local with respect to the previously mapped area and can be converted into Global Pose given an offset.You can either use this Pose to update your ARCamera transform in your scene or use the inverse of the Pose to update the transform of your AR Content.
How accurate is the Localization?

Localization is accurate to centimetre precision when a QR code or Image Access Point is scanned. After walking some distance after a localization scan, the user may experience ‘drift’ – content and wayfinding moving from actual placement by a few meters depending on the cell phone device.

 
Distance table for the QR codes.
Distance After the Scan and Its Associated Drift.
 

Please see Product Specifications to see recommended devices to minimize drift.


Accuracy can be increased to centimetre precision again by ‘re-localizing.’ Within the same session, the user can scan another QR code or Image Access Point associated with the map. Additionally, when the device starts to experience ‘drift’ in the session, the user will receive prompts to scan a nearby QR code to restore accuracy.

 
Chart showing the average drift after marker scan.
‘Acceptable’ Average Drift After Marker Scan​.
Do we need QR codes or IAPs every 100 ft / 30 m?
While it’s not mandatory, we recommend placing multiple QR codes or IAPs around large venues, ideally every 100 ft / 30 m. Positioning accuracy can be affected by phone technology, with older devices experiencing faster accuracy loss. To accommodate older phones, every 100 ft / 30 m is optimal but not necessary. If accuracy becomes a concern, additional QR codes or IAPs can be added. Keep in mind that not everyone requires this level of precision for a great experience.
How many QR codes do I need to map a venue?

It is recommended to install a QR code every 100 ft or one QR code per 10,000 sqft to ensure optimal accuracy and reduce drift. Each QR code should cover an area of 900 m2 (4303.4-9682.6 ft2) to further avoid localization drift.


Please see ARway Mapping Best Practices to minimize drift.